Timesheets Help Structure
This section is made up of three connected parts:
[ Timesheets] → [ Custom Field Types ] → [ Timesheet Templates ]
Each part plays a different role in how time is recorded and submitted. You are currently viewing: Custom Field Types
Overview
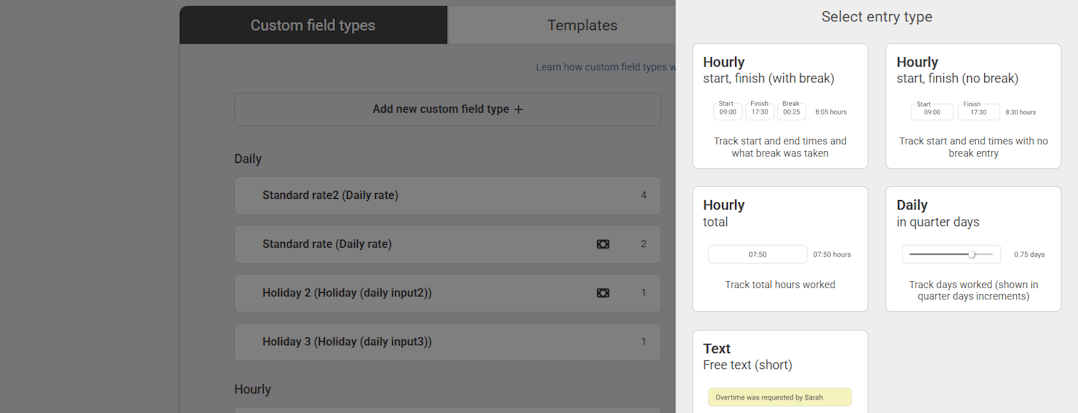
Custom Field Types define the categories of time that workers can log on a timesheet.
They answer one simple question:
What would you like tracked?
Custom Field Types are reusable building blocks. They describe the thing being tracked, but they do not control submission frequency or assign workers. That is handled by Timesheet Templates.
What Is a Custom Field Type?
A Custom Field Type is whatever you would like to track within your timesheets.
For example:
- Standard Hours
- Project A Hours
- Project B Hours
- Night Shift
- On-Call Time
- Sleep-In Shift
- Travel Time
- Notes
Each one represents a different type of input that may need to be recorded separately.
Once created, a Custom Field Type can be added to one or multiple Timesheet Templates.
What Custom Field Types Do Not Control
It is important to understand what CFTs do not do.
They do not:
- Control whether a timesheet is weekly or monthly
- Assign timesheets to workers
- Control approval workflows
Those settings are managed within Timesheet Templates.
Each Custom Field Type simply defines what is being tracked
Jump to...

How to track financials on a CFT
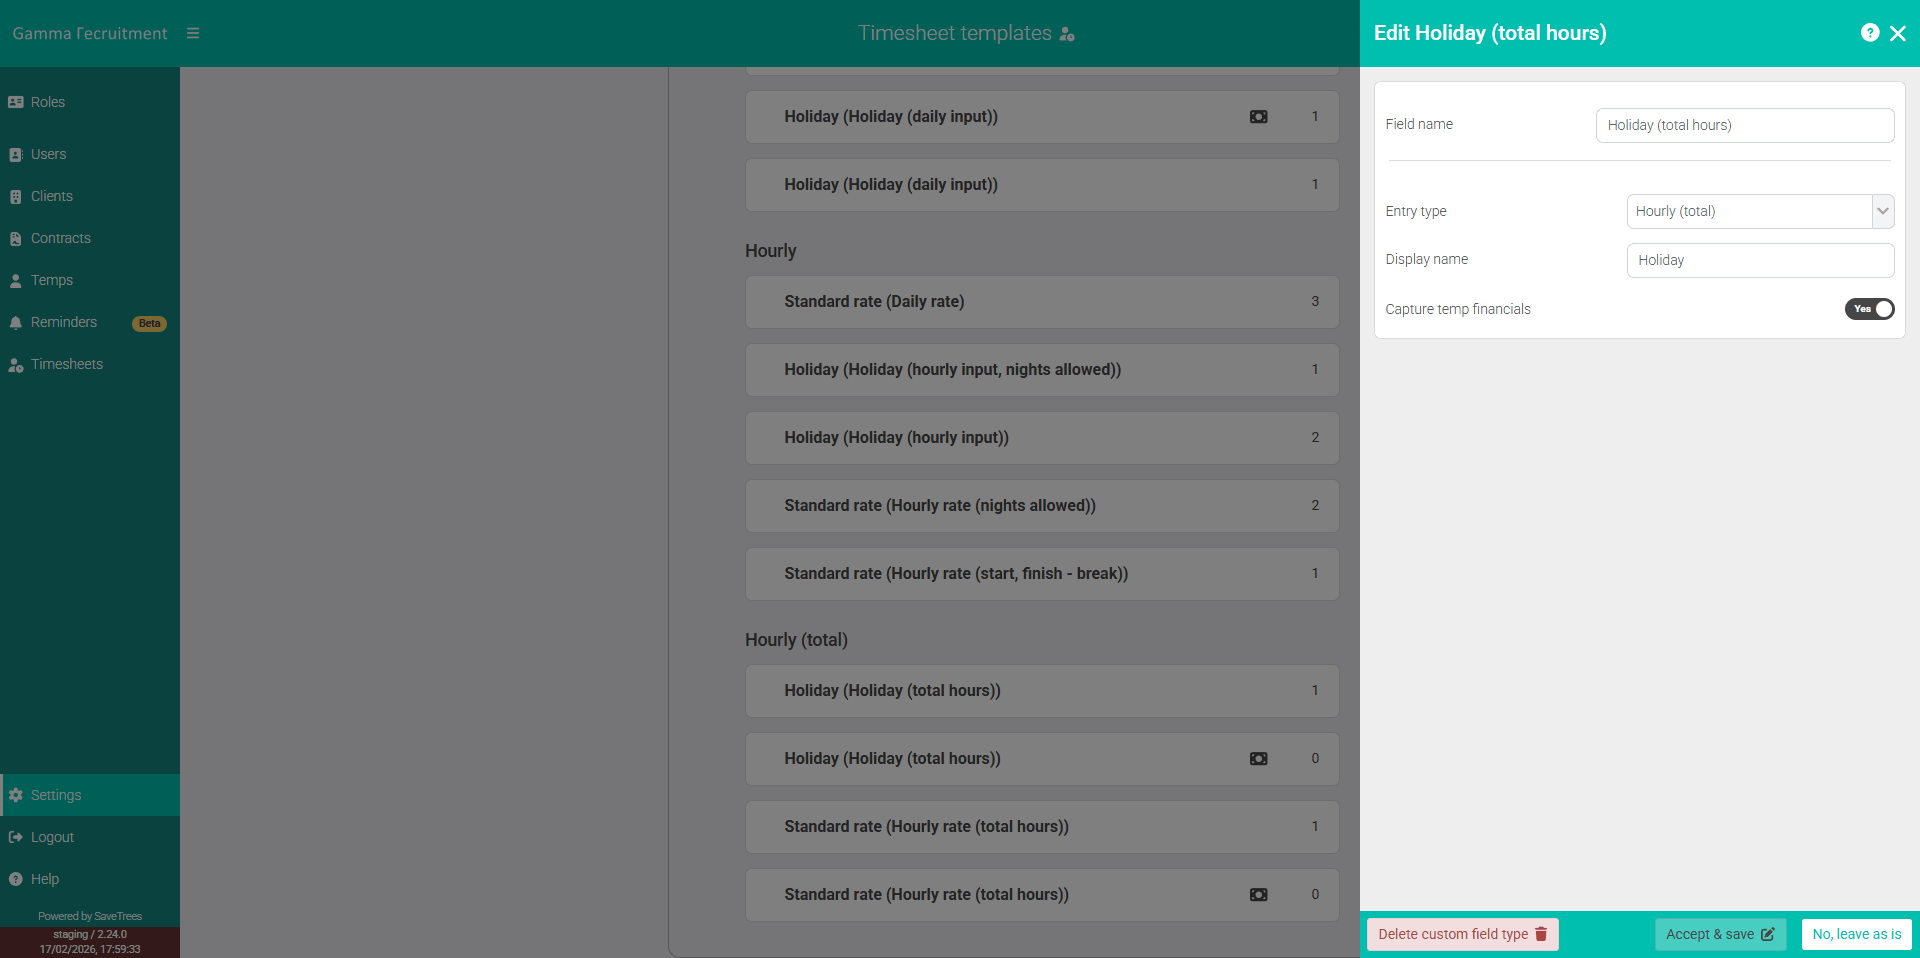
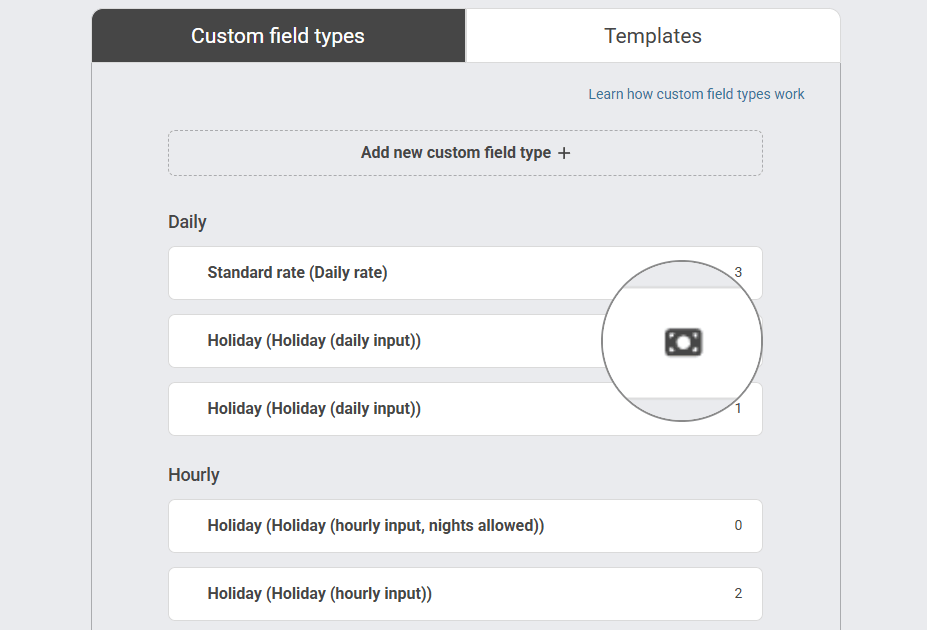
If you select yes next to 'Capture [Worker] financials', you'll then be able to assign pay and charge rates to your workers. To quickly see if this has been assigned to your CFTs, you'll see a money icon to the right hand side of each CFT. This will also show in the list of CFTs within the 'Create new timesheet template' list.
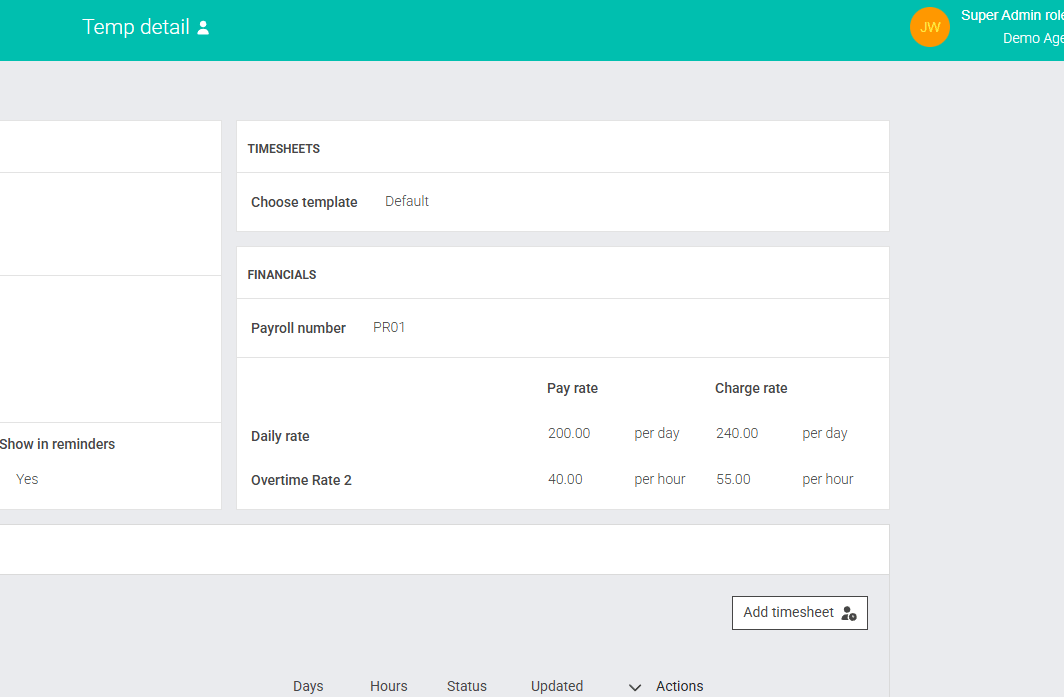
Once you've assigned a worker to a Timesheet Template with one or more CFTs that have financial tracking, you'll see those pay and charge rates both when you add the worker and within the worker detail page (as below).
This help article was last updated on May 1, 2026
Think this page needs an update? Please let us know
If you have a question that hasn't been answered, please suggest a new help page here