Timesheets Help Structure
This section is made up of three connected parts:
[ Timesheets] → [ Custom Field Types ] → [ Timesheet Templates ]
Each part plays a different role in how time is recorded and submitted. You are currently viewing: Timesheet Templates
Overview
Timesheet Templates control how timesheets are structured, how often they are submitted, and which workers use them.
If Custom Field Types define what time is being tracked, Timesheet Templates define how that time is organised and submitted.
Templates bring everything together.
What Is a Timesheet Template?
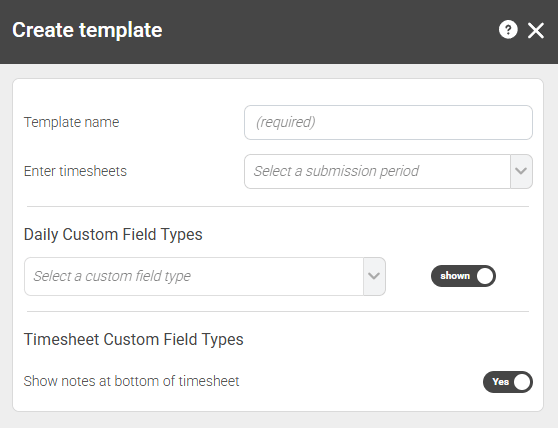
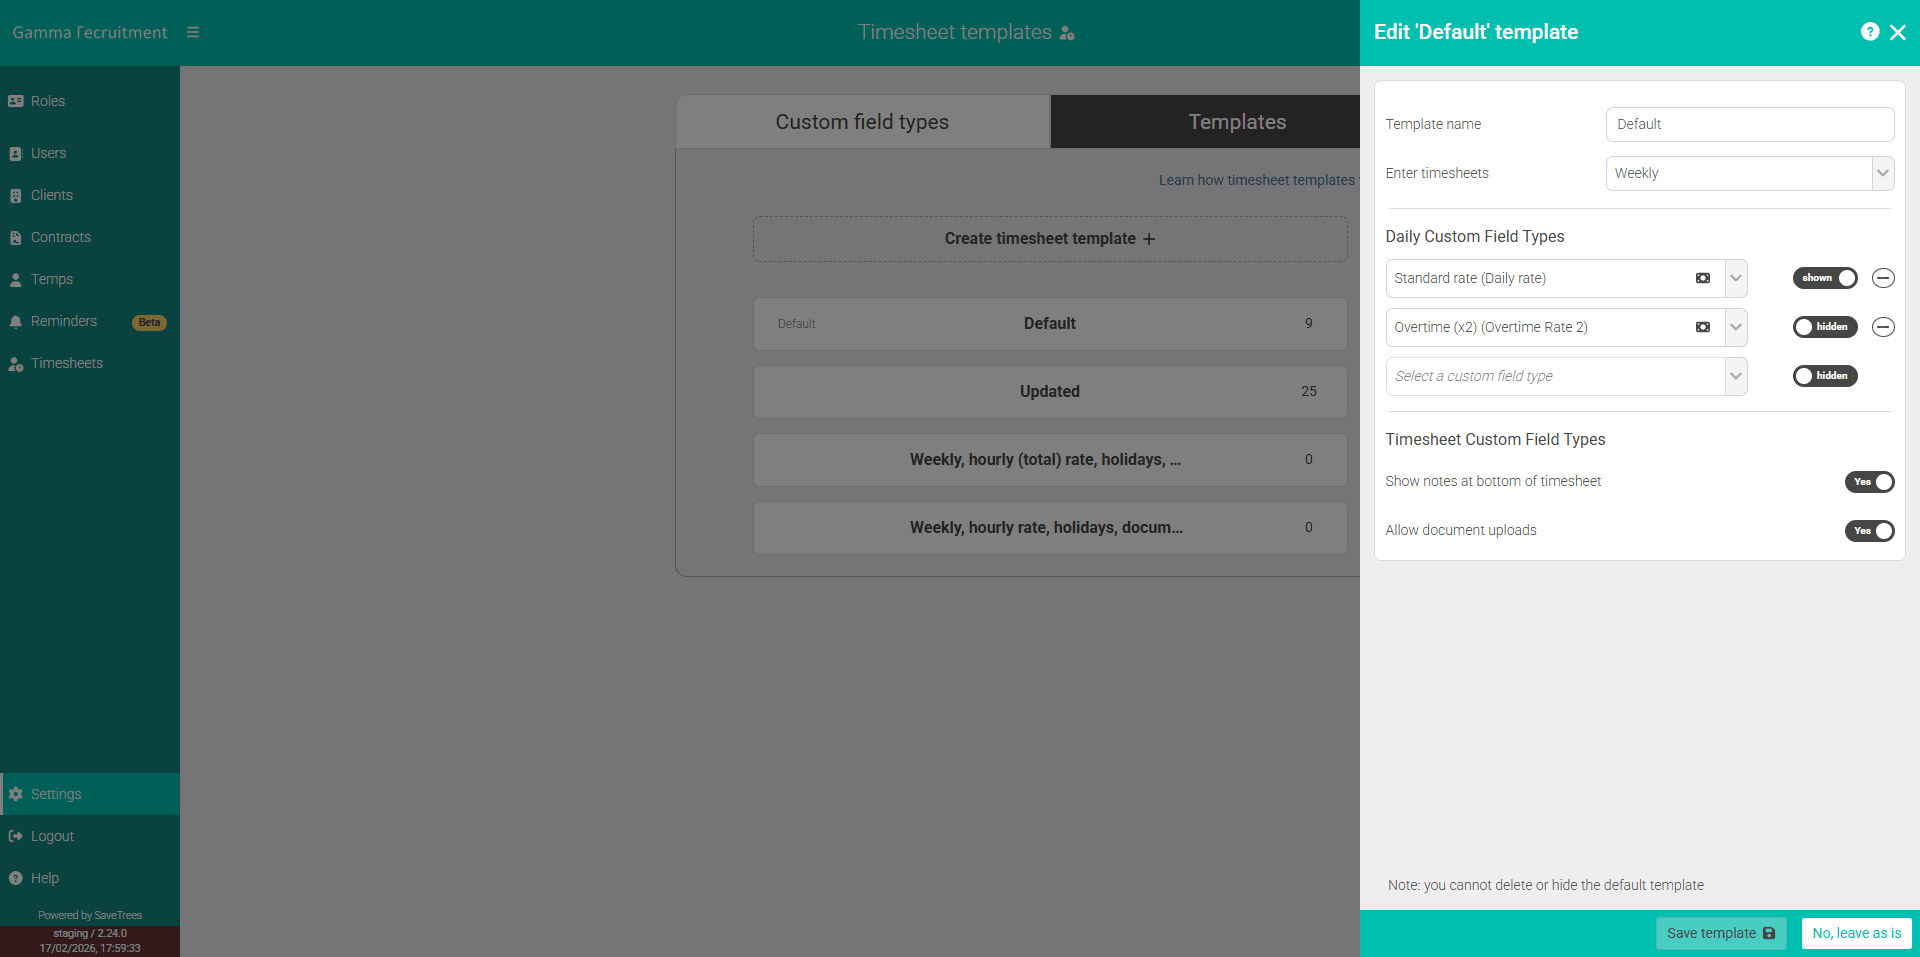
A Timesheet Template:
- Selects which Custom Field Types appear on the timesheet
- Determines what order they appear in
- Controls whether they are shown by default or hidden
- Sets the submission frequency (weekly or monthly)
- Controls whether notes are shown at the bottom of the timesheet
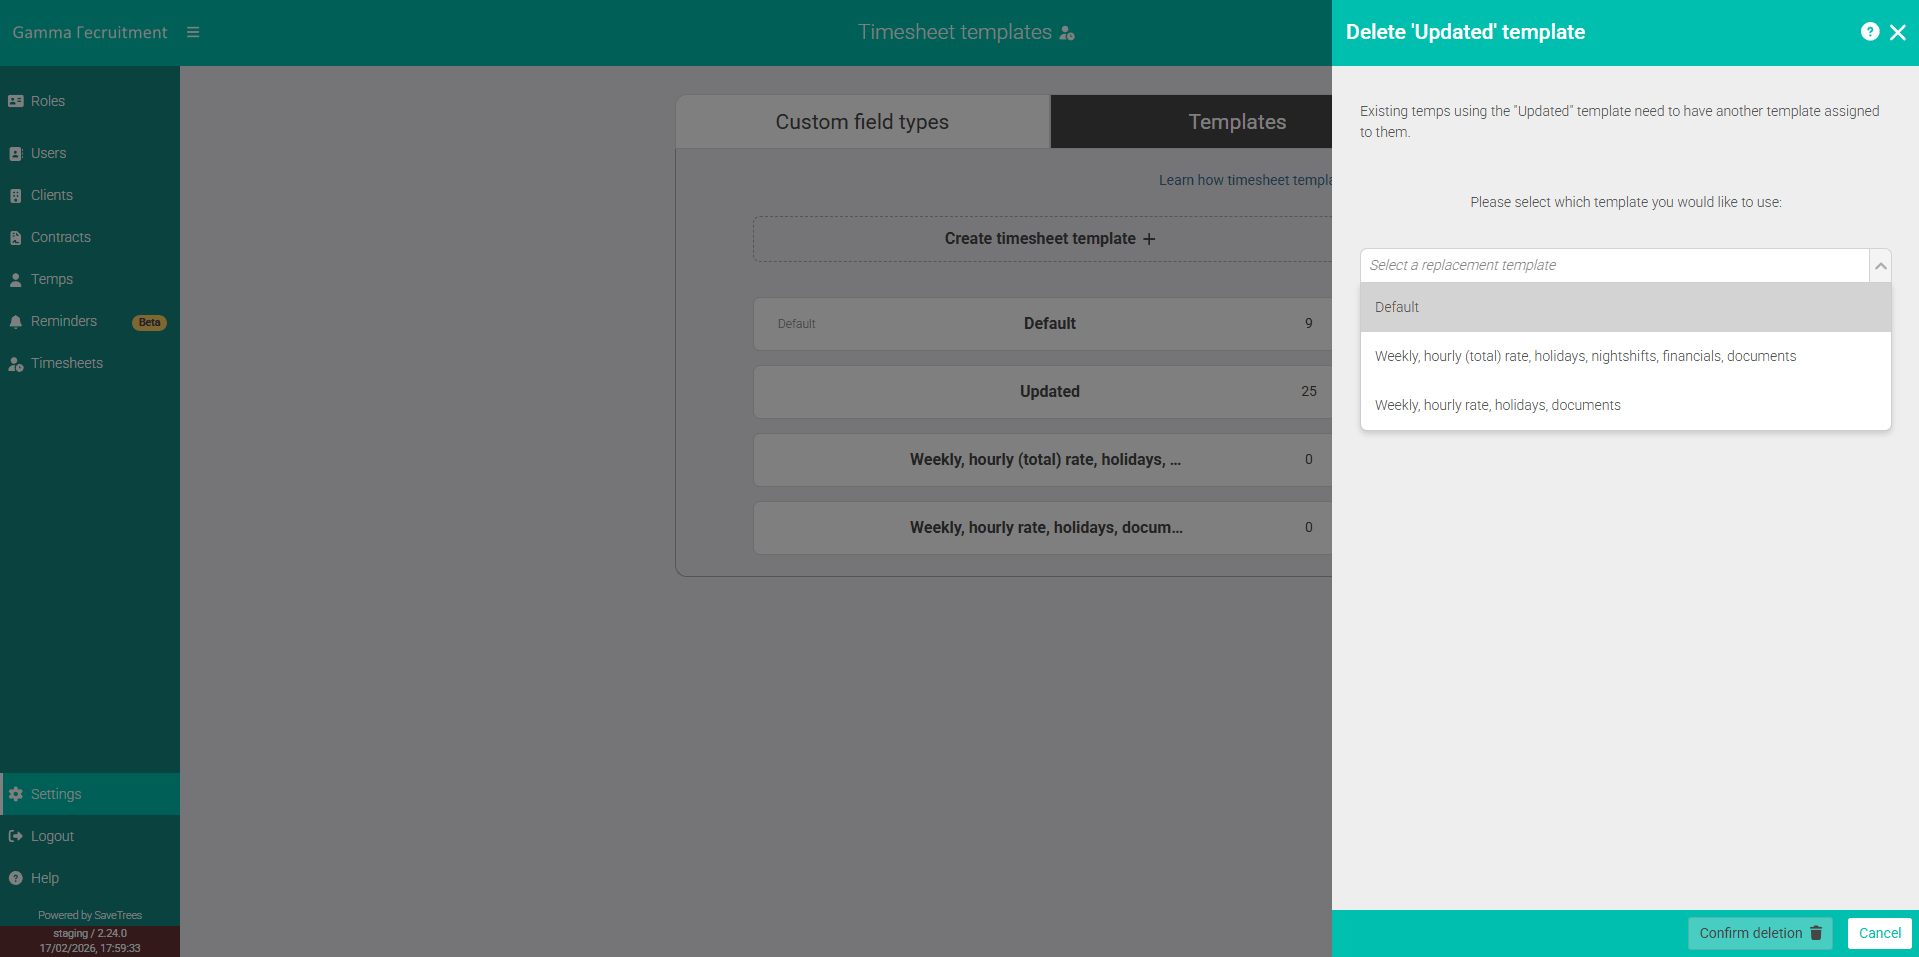
Workers only see and complete the Template they are assigned to.
Why Templates Matter
Templates allow you to create different timesheet structures for different teams, clients or working patterns.
For example, you might have:
- A Weekly Template for care staff
- A Monthly Template for office staff
- A Client-Specific Template for contractors working accross multiple projects
Each Template can include different Custom Field Types and different submission rules.
Jump to...
When to Create Multiple Templates
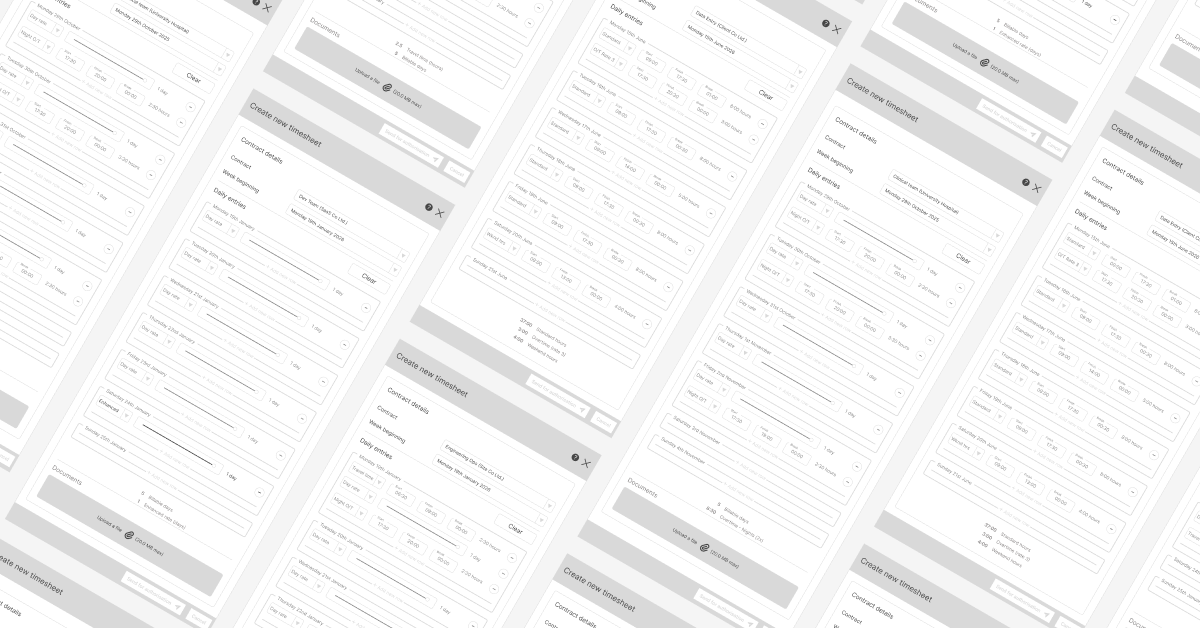
If you're like most agencies, you will probably only need one or two timesheet templates, however, we've made it flexible enough that if you need more, you're able to have as many as you want and craft them to be the perfect timesheet for each role.
Consider creating separate Templates if:
- Different teams submit at different frequencies
- Certain workers need different time categories
- You manage multiple clients with different reporting requirements
- Some roles require additional or fewer entry types
Templates give you flexibility without overcomplicating individual timesheets.
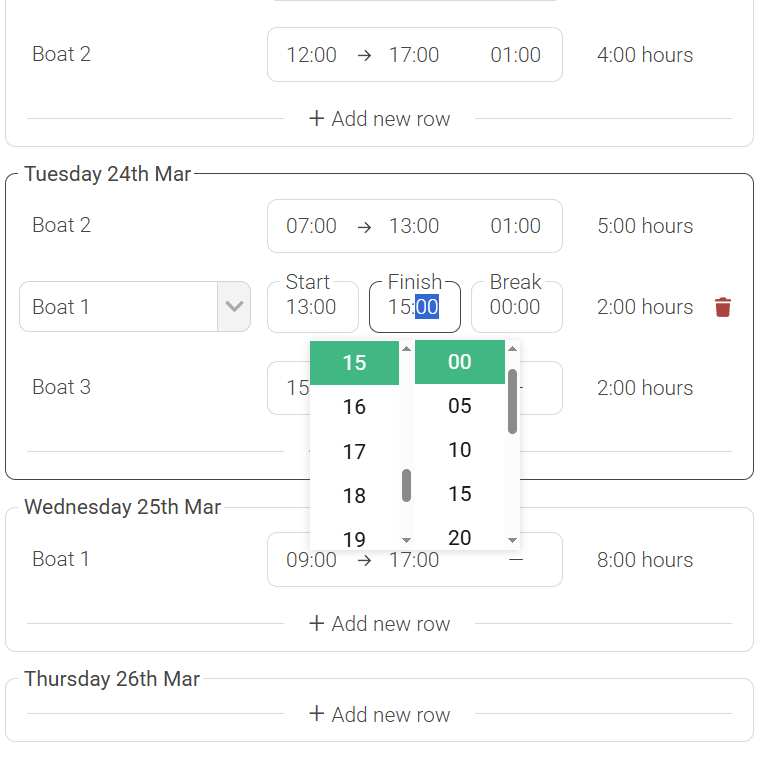
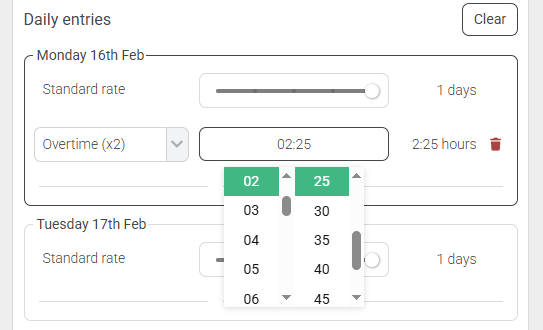
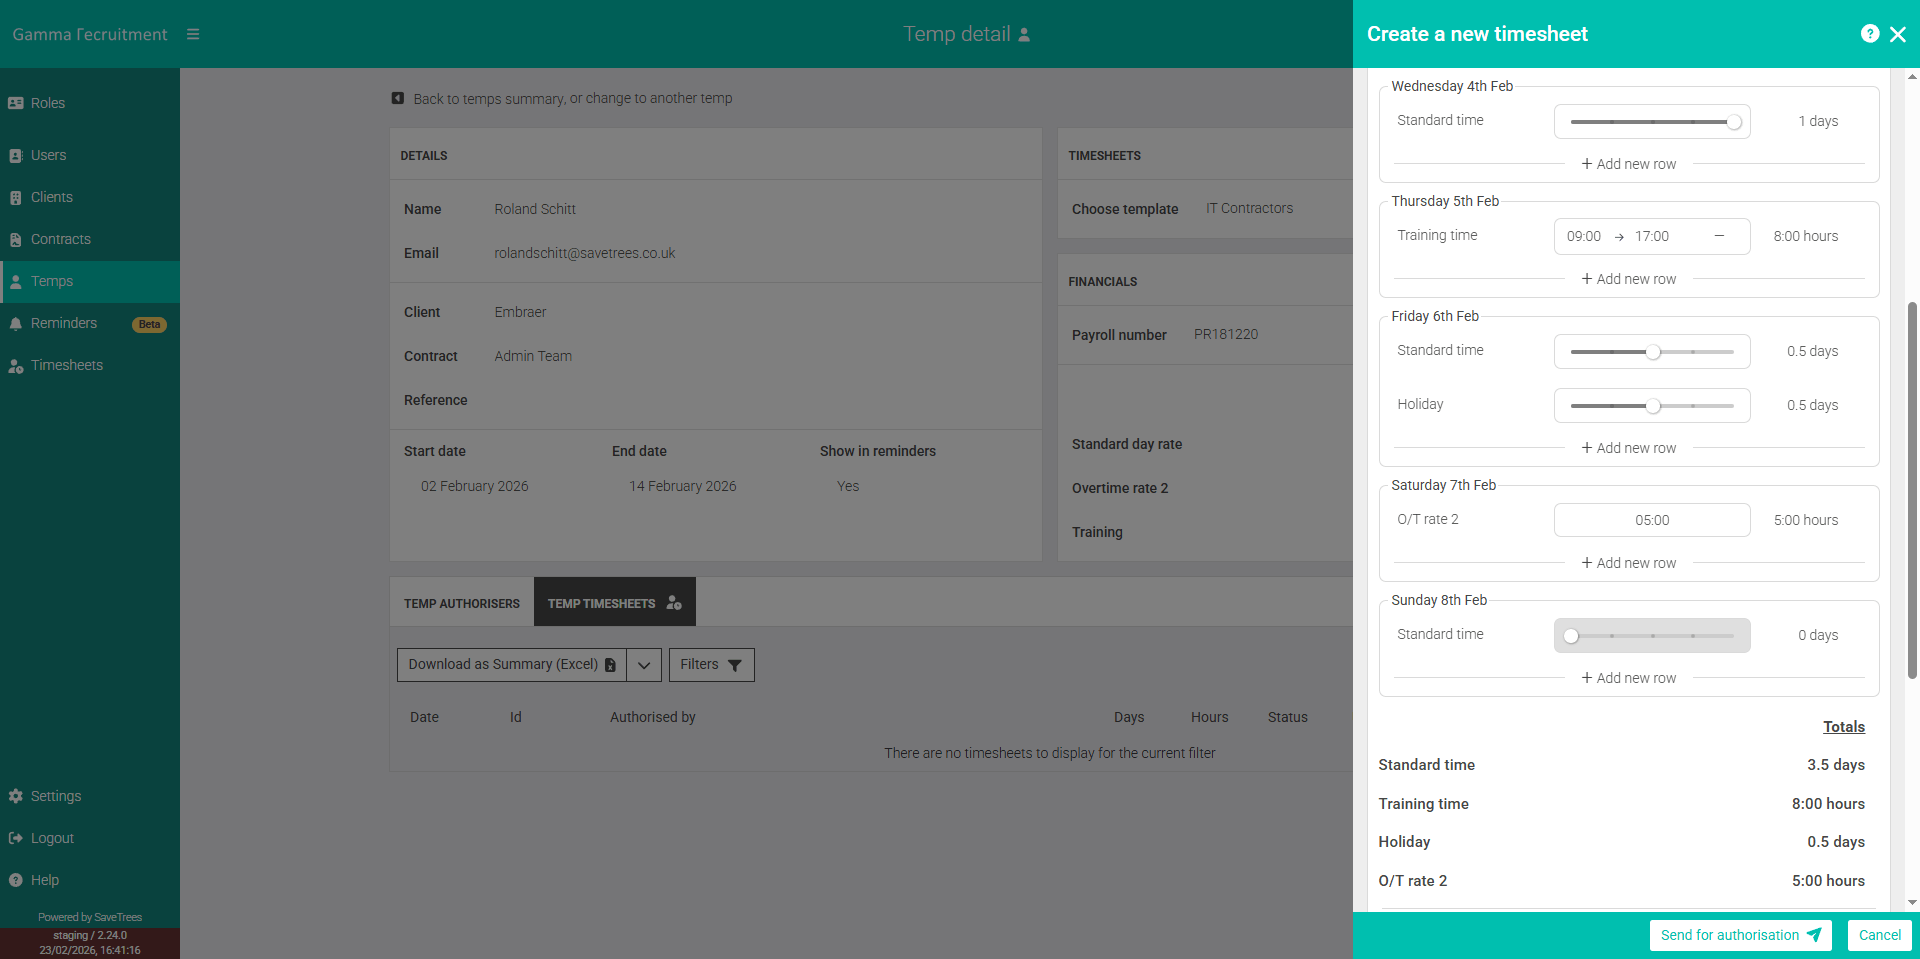
Below are some examples of templates that could be of use:
This help article was last updated on February 27, 2026
Think this page needs an update? Please let us know
If you have a question that hasn't been answered, please suggest a new help page here