How to Set a User as an Admin and Promote to Super Admin
If you need to give someone access to manage your SaveTrees account, you can make them an Admin, and if needed, promote them to Super Admin. Here's how to do both.
What this help article contains
Promoting users
Demoting/disabling users
Add a New User
-
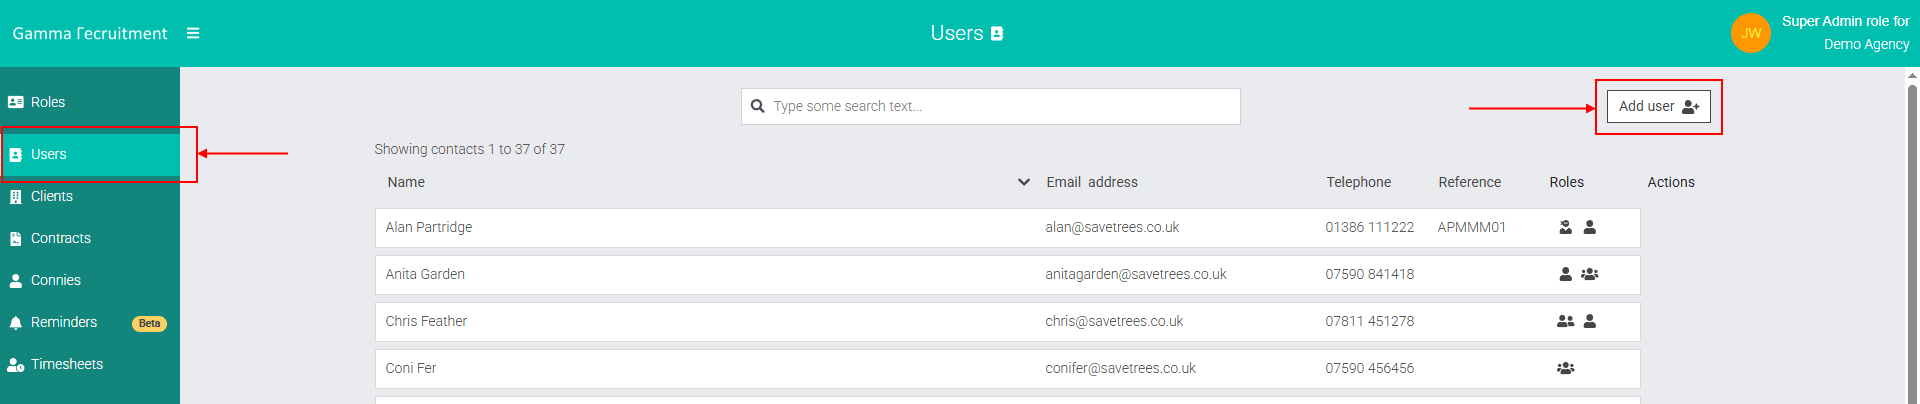
Go to the Users section in the left-hand menu.
-
Click “Add user” in the top-right corner.
-
Enter their full name, email address, and phone number (recommended). You can leave the reference field blank if it's not needed.
-
Click Add user.
They will now appear in your user list, but won’t have admin access yet.
 How to promote a user to Admin and then Super admin
Need to give someone full control of your SaveTrees account? Here’s how to upgrade an admin to super admin.
Make user an Admin
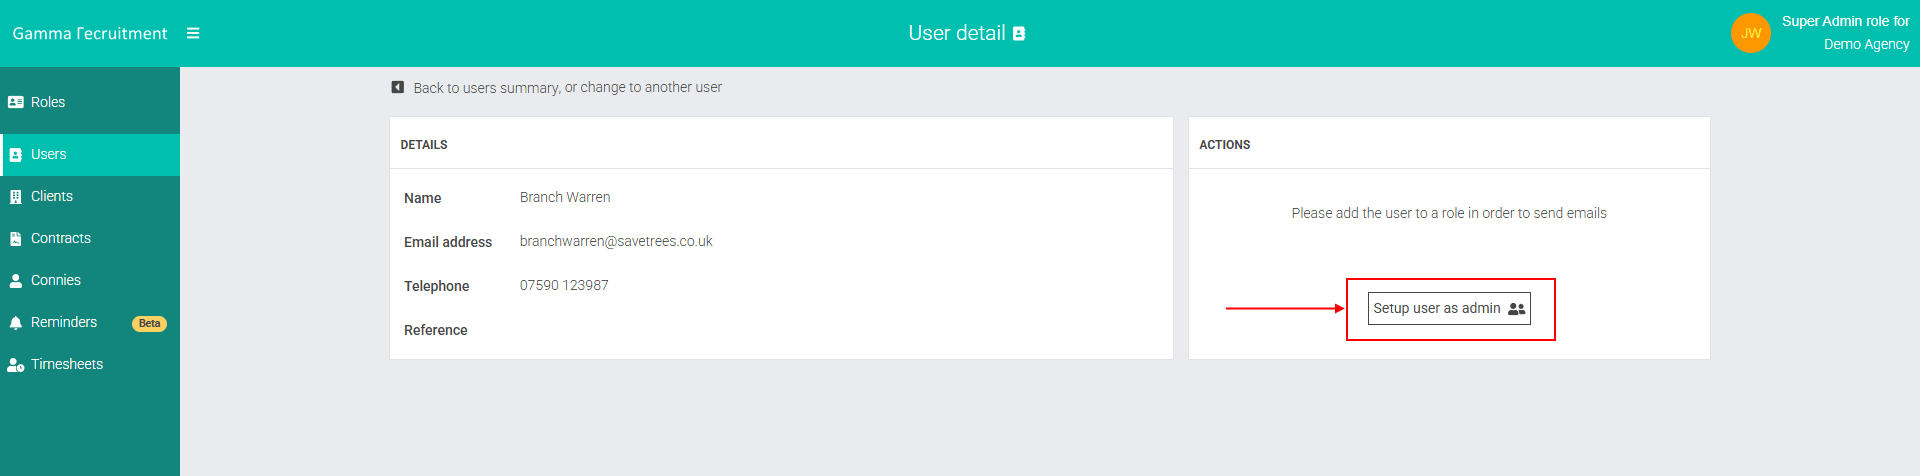
1. From the Users list, find the person you just added and click into their User detail page. You can do this by clicking anywhere on their row.
2. On the User detail screen, click “Setup user as admin”.
3. A panel will appear explaining what admin access includes. Click “Accept and invite”.
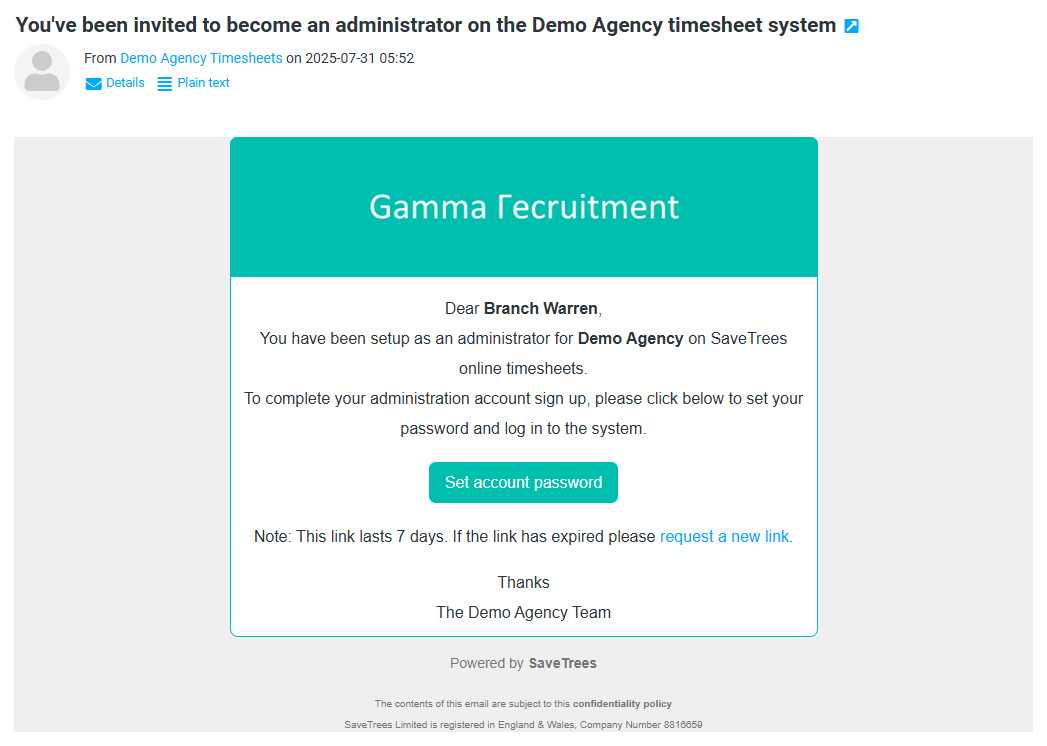
Your new admin will now receive an email inviting them to the system. They just need to follow the link and set their password and then they are in with their new admin role.
Promote user to Super Admin (Optional)
If you want this person to also be able to manage other admins and handle top-level settings (like billing):
-
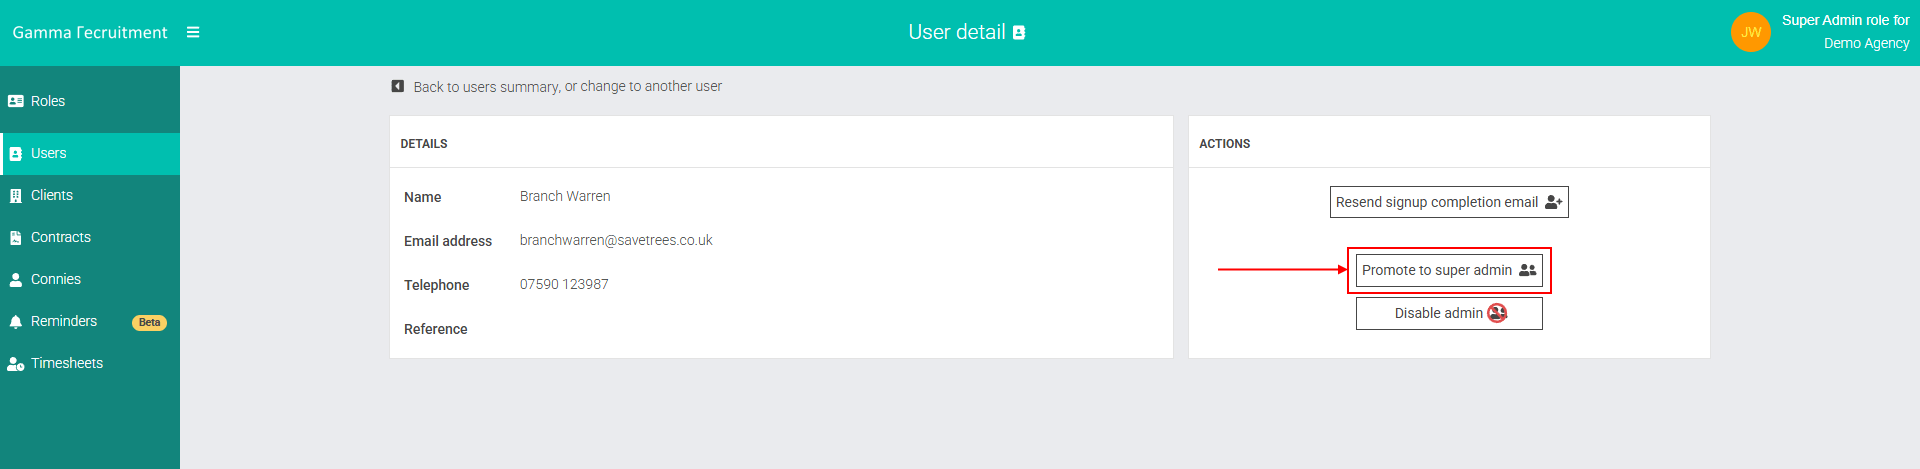
Go back to their user profile from the Users list.
-
Click “Promote to super admin”.
-
A confirmation panel will appear. Click “Promote to super admin” to confirm.
 Super admins can remove other super admins - including you - so only grant this level if you fully trust the user.
 Quick Summary: Admin levels and Settings permissions
Here’s a breakdown of what settings can be changed by admins
| Setting | Admin | Super Admin |
|---|---|---|
| Company | ||
| Agency name |  No No |
 Yes Yes |
| SaveTrees system URL | No |
Yes |
| Your company URL | Yes |
Yes |
| Terminology used for ‘workers’ | Yes |
Yes |
| Branding | ||
| Update company colours and logos | Yes |
Yes |
| Approved timesheet forwarding email address | Yes |
Yes |
| Response address for system emails | Yes |
Yes |
| Documents | ||
| Turn document feature on/off | No |
Yes |
| Beta Features | ||
| Enable or disable beta access | Yes |
Yes |
| Timesheets | ||
| Show timesheets by start/end of period | Yes |
Yes |
| Change which day the timesheet week starts | Yes |
Yes |
| Switch between clock time and decimals | Yes |
Yes |
| Apply or remove default timesheet settings | Yes |
Yes |
| Add or remove timesheet templates | Yes |
Yes |
 How to Demote or Remove an Admin
Whether someone’s role needs to change or you just want to tidy up access, here’s how to manage admin permissions safely.
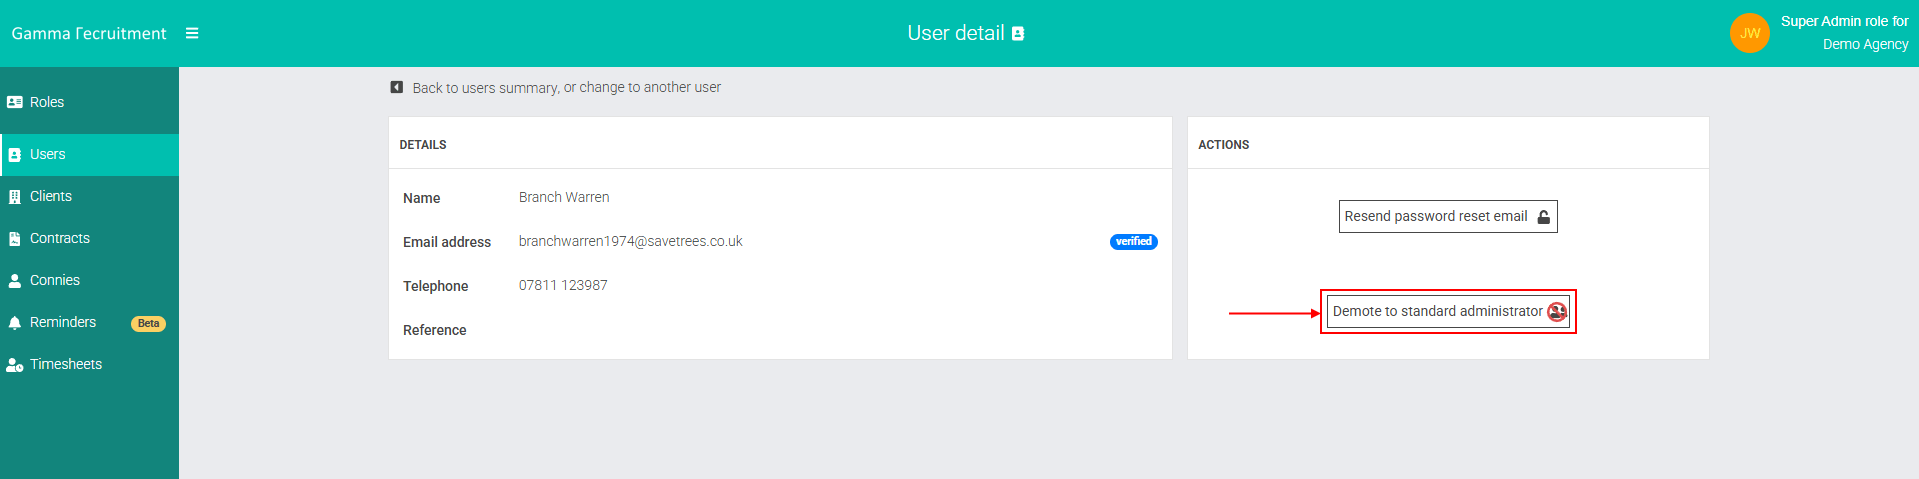
Demoting a Super Admin
If someone no longer needs top-level access, you can easily scale them back to a standard admin:
-
Head to the Users section.
-
Find the super admin in the list and open their User detail page.
-
Click “Demote to standard administrator”.
That’s it - they’ll now have regular admin permissions, and they won’t be notified about the change.
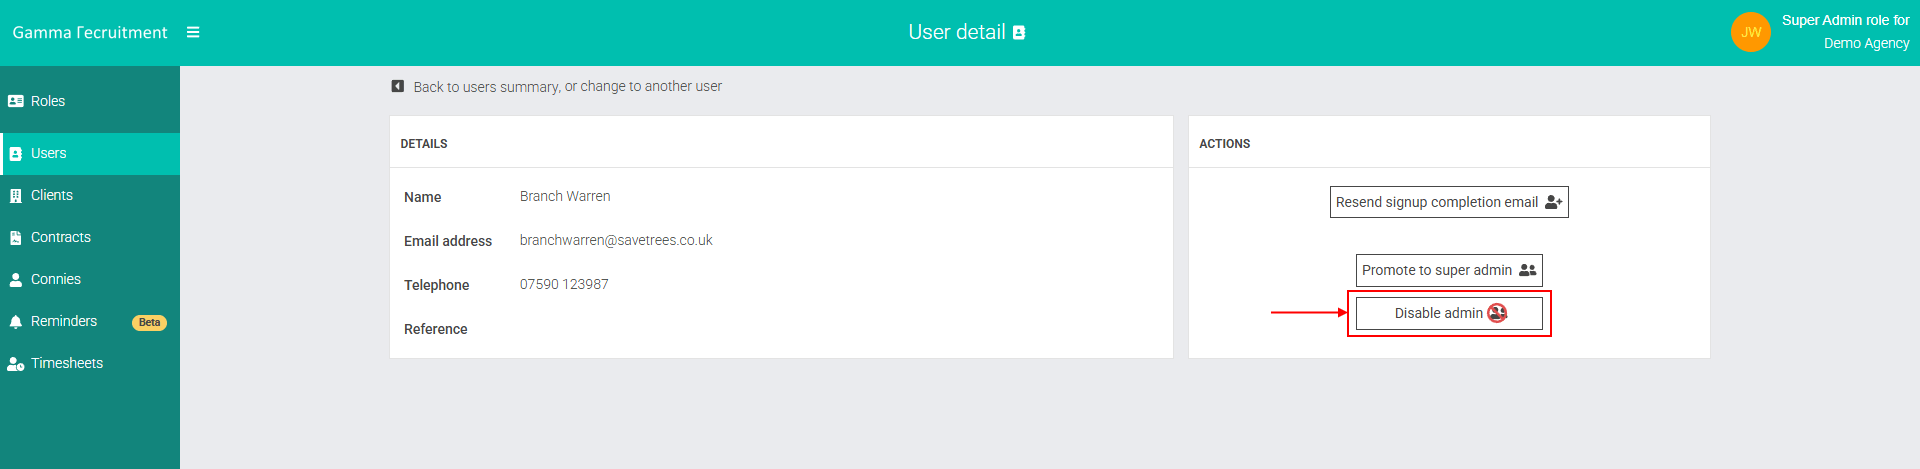
Disabling an Admin
To remove admin rights completely:
-
Go to the user's profile via the Users list.
-
Click “Disable admin”.
They’ll immediately lose admin access - and again, they won’t get a notification.
Tip!
Even if they’re currently logged in, disabling an admin kicks them out of that role straight away. So if a system admin ever goes rogue or makes changes they shouldn’t, you can cut off their access instantly.
This help article was last updated on July 31, 2025
Think this page needs an update? Please let us know
If you have a question that hasn't been answered, please suggest a new help page here